Nose Cone Shoulder

Home Construction Design Members Launch Report Videos Sponsors


Cutting  
bulletThese pages describe the process used to make the nose cone shoulder.
bulletThe first step (after cutting the tube to length) was to rough sand the outer surface of the coupler to remove any high spots and ridges.
bulletThe tube was marked to remove a 1.2" strip from the length of the tube.

Prep

 
bulletThe inside surface of the shoulder was sanded with 60 grit paper to give a good surface for the epoxy to bite into.
bulletThe edges were beveled to about 30 degrees, this too was to give more surface area for the epoxy to bond to.
Joining  
bullet
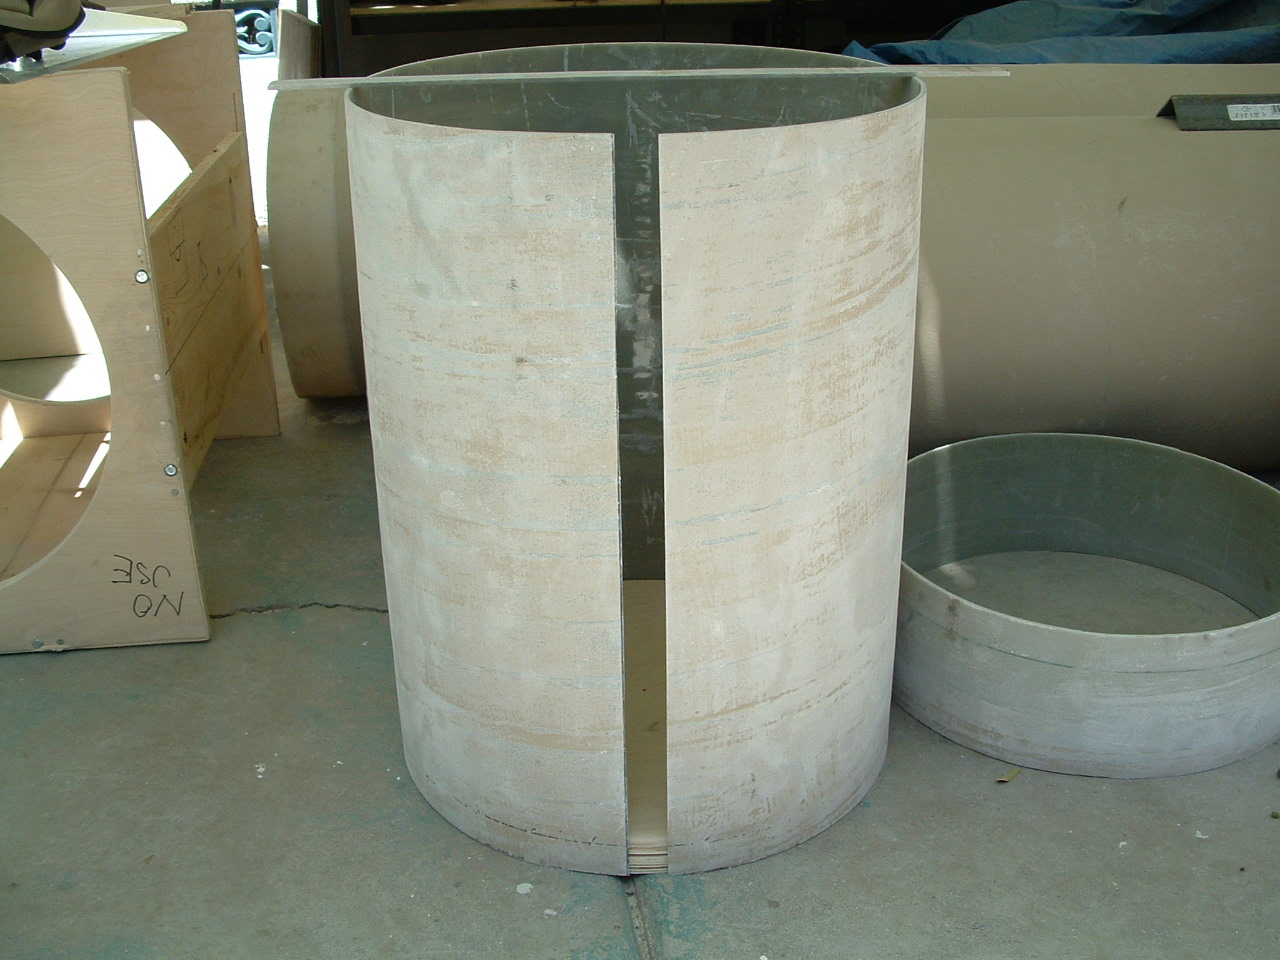
The tubes will pushed into the main body tube to support and form it to the desired size. A layer of wax paper will separate the shoulder from the body tube during the epoxy phase.
bullet
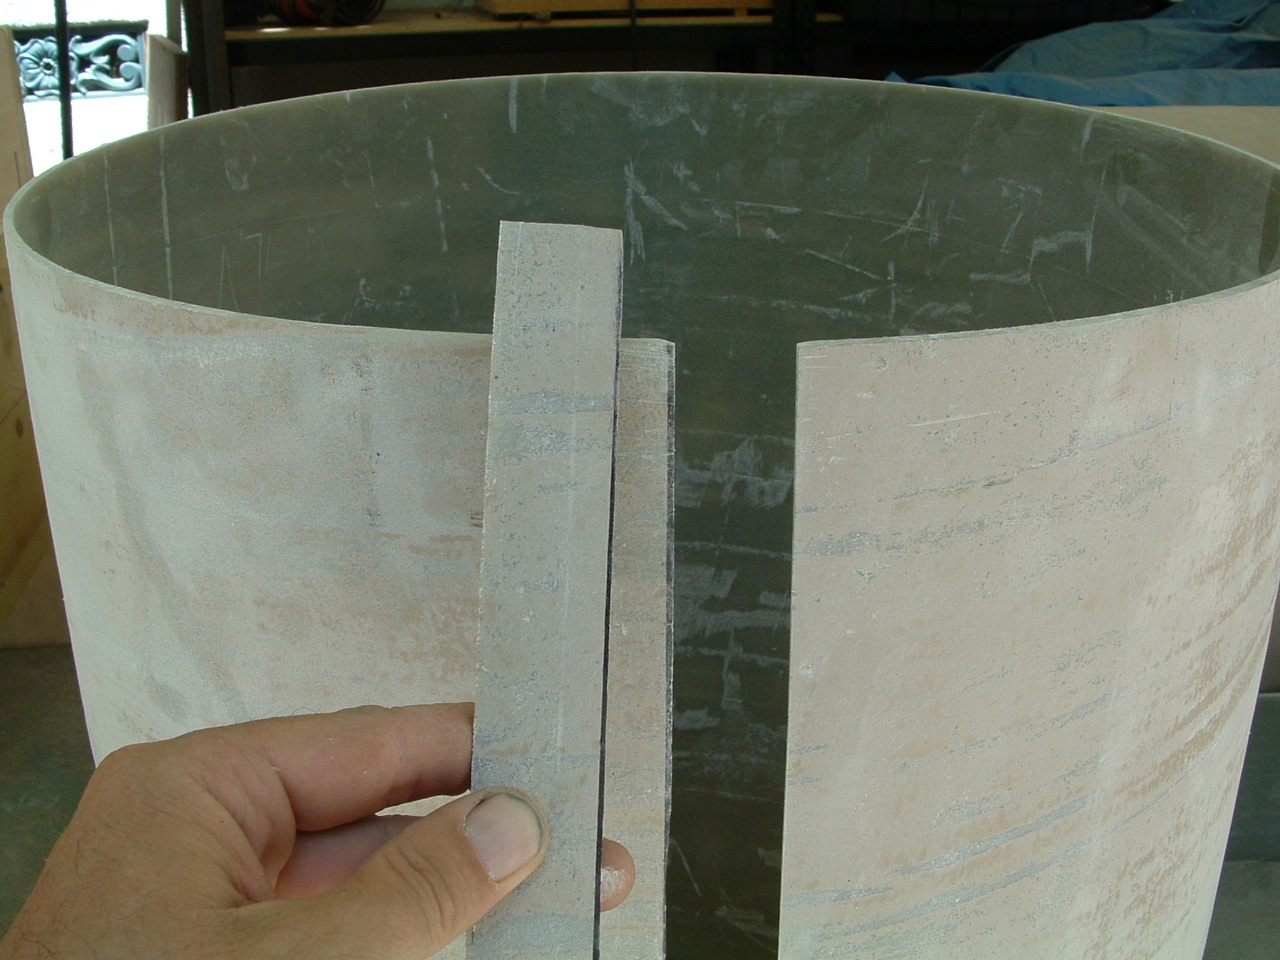
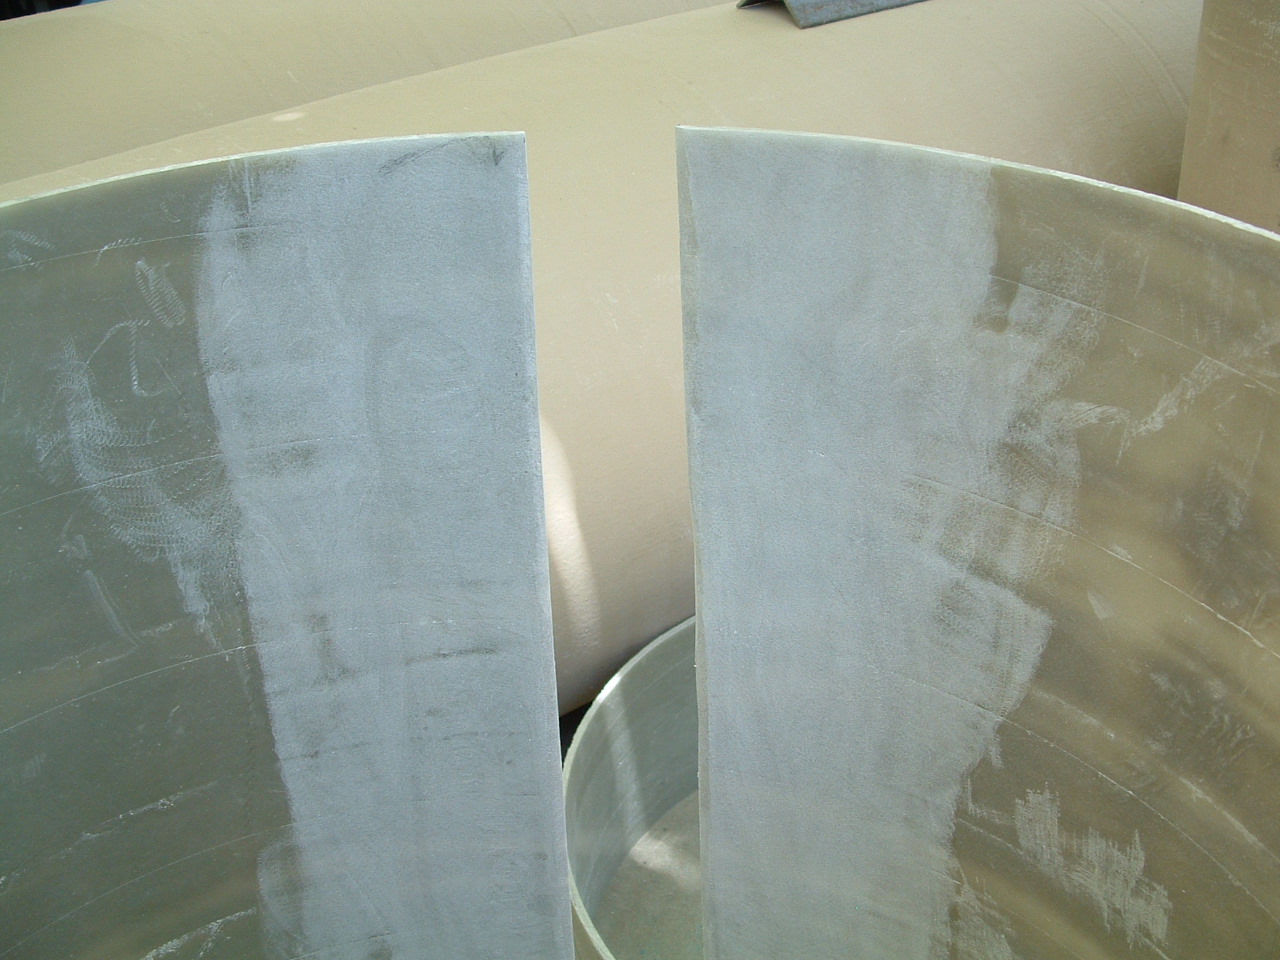
A mixture of cut fibers and epoxy was be used to complete fill the filleted area. The cut out section was them be laid on top of the joint.
bullet
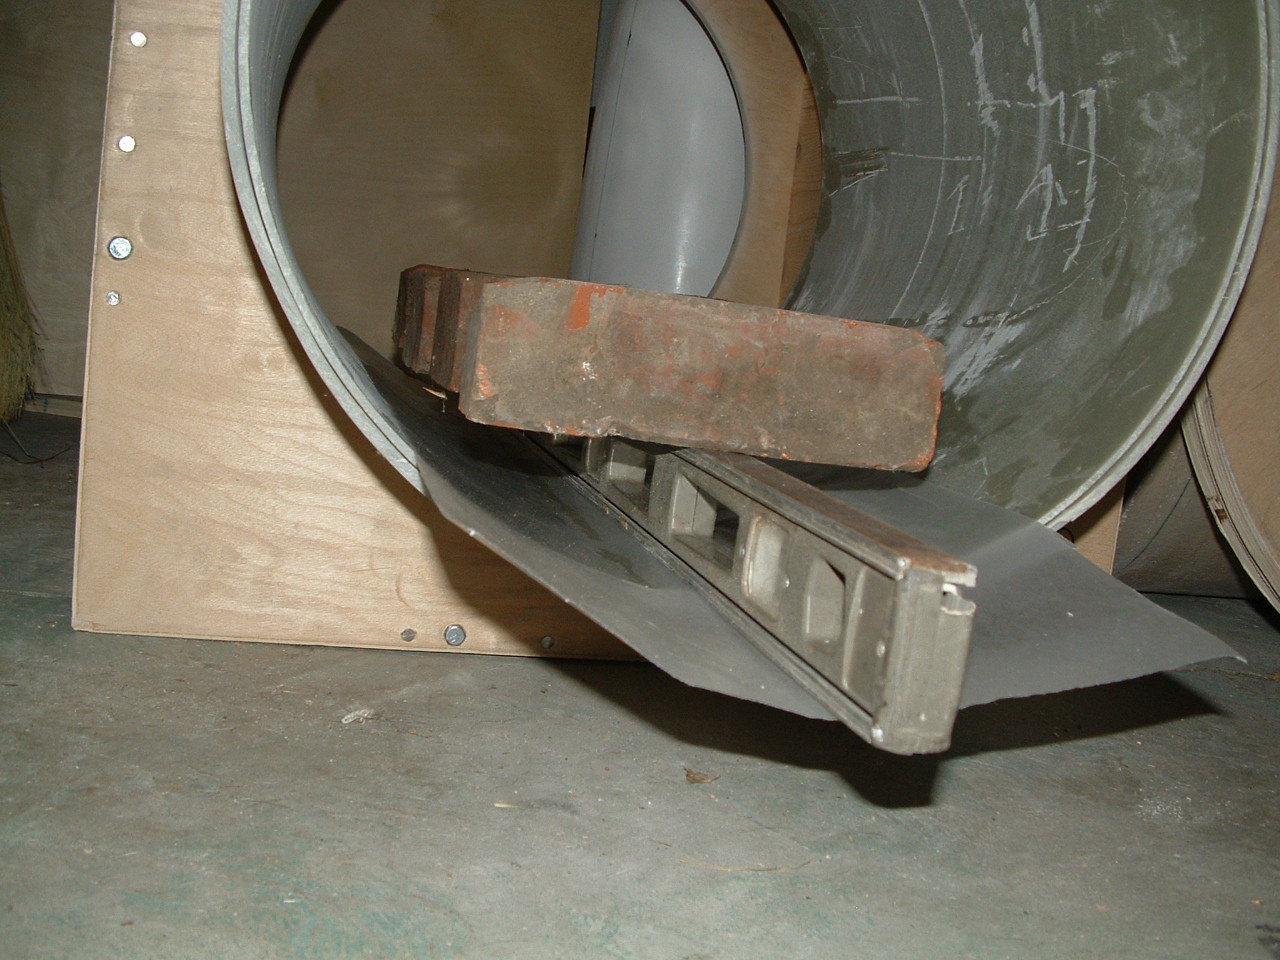
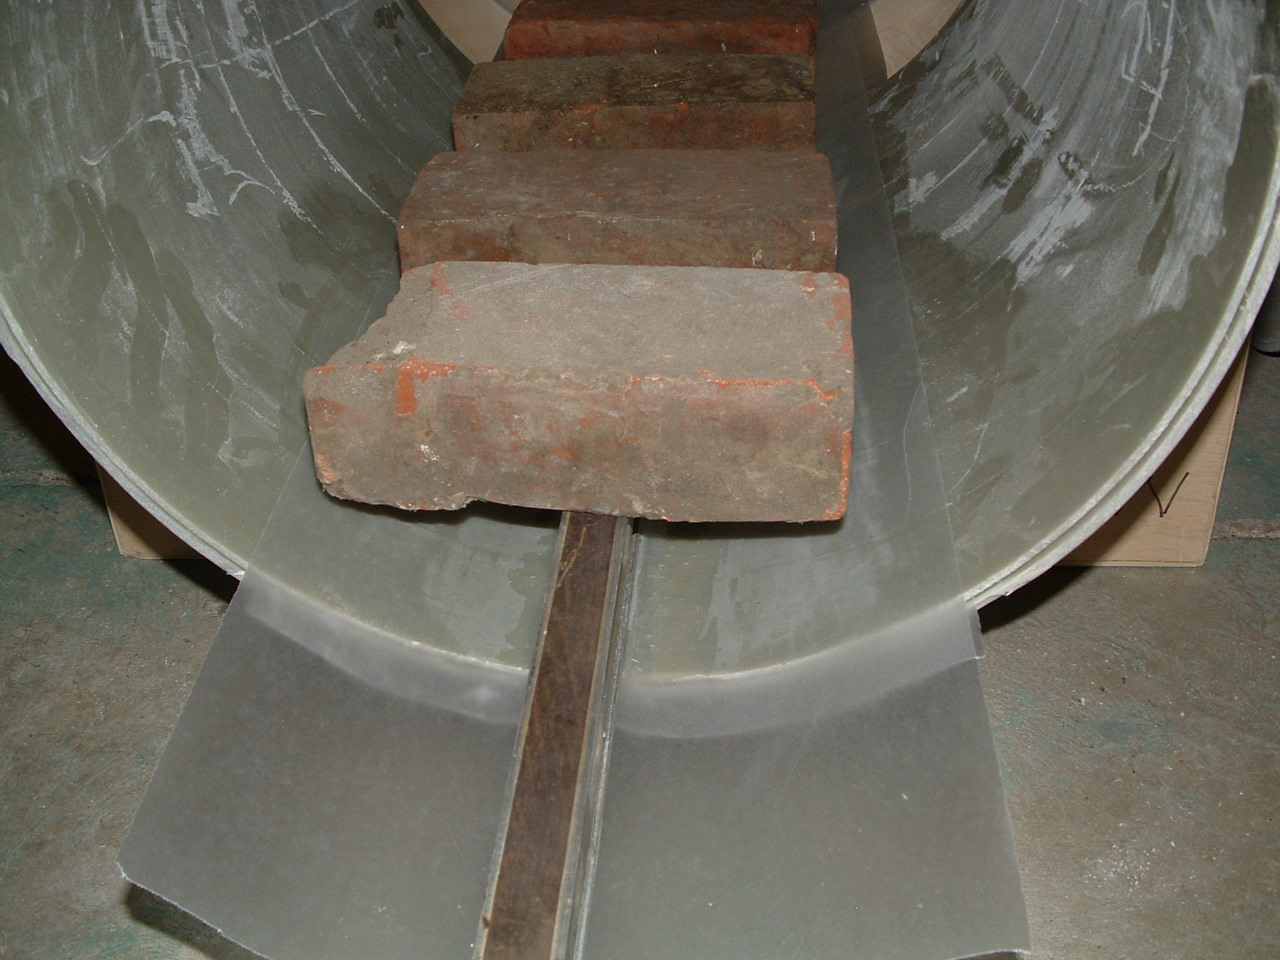
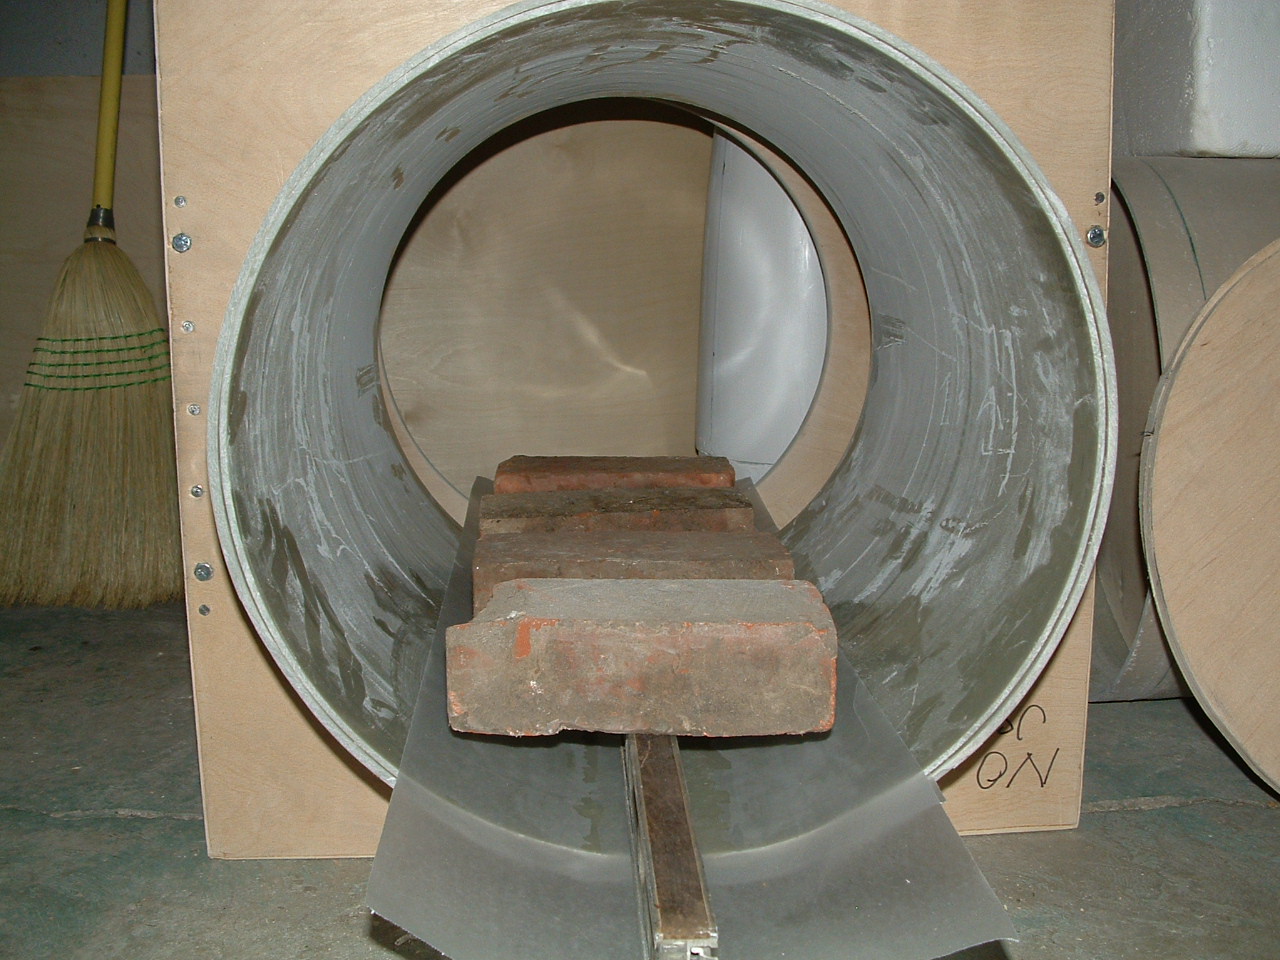
Another layer of wax paper was applied and a 5 foot level was applied to the center of the joint.
bulletBricks were laid onto the level to apply pressure while the epoxy cured.
bulletFor additional strength a 4" wide (0.125" thick) piece of aluminum plate will serve as the final backing for the joint.


For problems or questions regarding this web contact WebMaster@BlackBrant2.com
This page looks best when viewed on my computer and was last updated on 01/24/09
THE BLACK BRANT PROJECT on the verge of insanity